Shower Tile Install Tips And DIY Benefits
Posted on October 17, 2016
Table of Contents
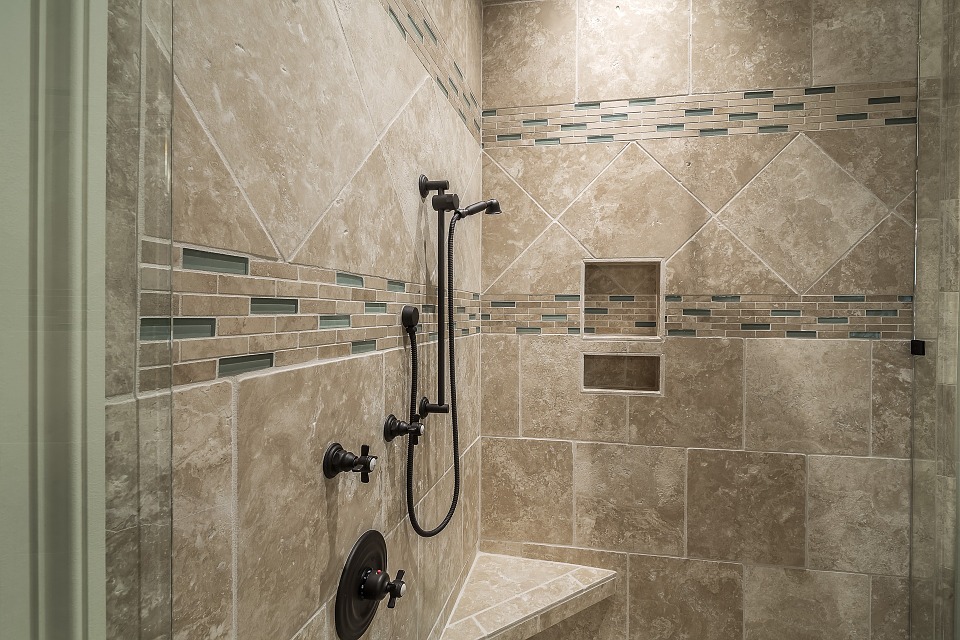
Tiling your shower is a home improvement project you can add to give your house a customized look and make yourself feel pampered. Taking shower tile installation by yourself may seem daunting at first although tiling a shower is same as tiling a floor.
Tools and materials you need
- Electric screwdriver
- Notched trowel
- Sanding block
- Level
- Sponge
- Tile nippers
- Spacers
- Pencil
- Thin-set mortar
- Rubber grout float
- Broom
- Safety glasses
- Tape measure
- Wet saw
- Sanded grout
Shower Tile Install Method
Step 1. Preparation
Once you have chosen a perfect tile for your project, you will first need to ensure your shower wall is well prepped. Any old tile should be removed and the cement backer board placed as the foundation before installing your new shower tiles.
Check to ascertain whether the cement backer board is in good condition after removing the old tiles. If not, you will need to extract the old one and then install a new board.
Apply waterproof membrane to your backer board to make sure that water cannot seep through it and cause damage. However, you can use a brush or a roller and apply like you’d a coat of paint. Always consult the directions/procedure on the product you have selected for particular application instructions.
Step 2. Layout
With your walls ready, you can now start installing your new tiles. Make sure you measure your layout correctly and also ensure that you have enough tiles which can cover the entire project. As with every tile project, you should have 10 % of more material with you to cover wastes and the mistakes made during the installation. Begin with the 2nd row up from the bottom of your shower. This is because it’s common for the shower floor to be irregular (not be square) which can lead to a crooked tile installation.
Also, you must ensure that the topmost row contains a full vertical tile. Measure the flat board to a height of the project then lay out your tiles on the floor before you begin placing them on the wall. Through this, you will eliminate any potential problems as well as be able to select where you can cut the tiles to match your design perfectly. You can use spacers in the dry run to make sure the measurements are correct.
Once you have determined the vertical starting point, ensure you mark it. You can install a level board on a cement backer which extends from the bottom edge to the topmost right corner. This will give a level base for the first row of your tile and help in holding it in position.
Like floor tile, you will also need to ascertain that you’ve got a proper horizontal starting point. First and foremost, you should find the middle point of your wall and mark it. Next, lay out a tile on the floor with a board that is of the same length as your wall where you will be installing. From the middle point, you’ll want to lay a tile along the base all the way to every end. However, you might need to cut the tiles once you get to the corners.
Step 3. Applying a Thin-Set Mortar
Choose a thin-set mortar fit for your tile, and then use a drill with the mixing paddle to mix it. Make sure you follow the manufacturer procedure on the package. Continue adjusting the mix till the consistency like that of the creamy peanut butter is achieved. Only prepare enough set for thirty minutes of work.
Using the flat area of your tile trowel, spread a ¼ inch coat of the prepped thin-set where you’ll lay the tile. Then, with a notched edge of your trowel, use the combing motion to work a thin-set such that there are standing ridges entirely. Ensure not to spread excess thin-set than that can be used for15-minute time span since it might start to set hence reduce bond effectiveness.
Step 4. Cutting Tile
Since you have already laid out the tile, you need to know where the tile cuts will be made. Using your pencil, mark the cut lines on a tile(s) that needs trimming. Make appropriate cut using a tile cutter or a wet saw.
Step 5. Setting Tile
Setting a tile in the shower is similar to setting floor tiles with the exception that you are working vertically on a flat surface. Begin by placing a tile on the project right from the starting point you have identified. Start at the middle point or any adjusted point that you defined in the “layout” step then work outward from that point.
Remember to commence on the board that you installed in phase 2 above to ensure a level installation. It is best always to use a level to ensure the rows are going in straight.
Use slight twisting motion when placing the tiles into rightful position on the thin-set. Do not forget to use appropriate spacers as recommended by your manufacturer of the tile during your tile installation. After you have worked your way from the bottom to the topmost point of the shower, it is time to get back and set tiles on the first row right above the tub /shower tray. Start by removing the board that was used as the base and commence from any designated starting point. You should note that it is likely you will need to cut your tiles from this row/end to ensure a perfect fit.
When all the tiles are in rightful place, and your project looks great, two more steps will be necessary before moving on to grouting your tiles. You will need to allow your installed tiles set for a while. You can wait for 24 hours prior to grouting your tiles. Always refer to instructions on your thin-set to be certain.
Step 6. Grouting your Tiles
After a lot of planning plus hard work, your tiles installation is nearing completion and it is looking magnificent like you had envisioned. While you are close to the end, do not underestimate the value of the grout. As it may appear nothing more than cement, the grout you select can add either character, color or charisma to your tile installation project.
Phases in Grouting Tiles
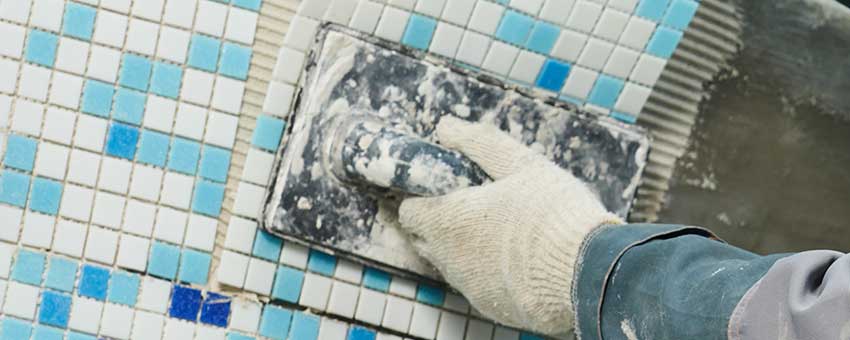
Phase 1. Prepare/Mix and Apply the Grout
Before you commence, be certain that you’ve proper tools & materials at hand. Also, make sure the tile had the good time to set. This is essential as grouting very soon might cause the tiles to shift. Let the tiles set for 24 hours as mentioned in step 4 above. Select a grout that’s recommended by tile manufacturers for brilliant results and follow the prep instructions in the package. Once you’ve mixed your grout to required consistency, you are ready to commence.
Apply the right amount of grout to fill in the grout joints. Using a grout float and the sweeping motion, work your grout into the joints while keeping the float at an inclination angle of 45 degrees to help in ensuring they’re filled. Once filled, use a float in the same way to remove the excess grout. Proceed to the next area and repeat these steps until all the grout joints are filled.
When the grout starts to harden, use a sponge to wipe the tiles and take caution not to remove the grout from grout joints. Once the grout sets, you will need to break the sponge again to eliminate the haze that appeared during the process.
Phase 2. Seal the Grout
3-7 days after you have applied the grout you will need to add the grout sealer. Adding a grout sealer to the grout will aid in protecting it from stains that may occur. You will need to use the sealer specified for a grout used in the project
Phase 3: Keep Your Sealer Dry and Enjoy!
Now that you have applied the sealer, you will have to keep the bathroom traffic-free until when the sealer cures. Consult your manufacturer’s manual on the sealer for specifications.
Once cured, test the effectiveness of your sealer by putting a little water on a grout where you applied the sealer. If it puddles, then the sealer is working, sit back and enjoy your efforts!
Selecting The Grout Color Tips
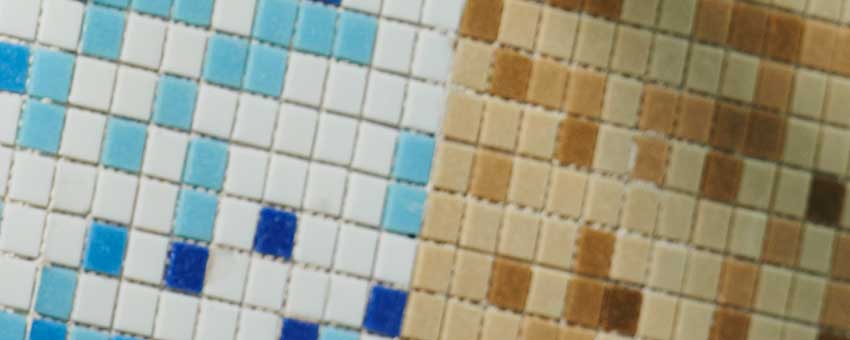
Grout is usually an overlooked element when tiling walls, floors or backsplashes. There are 3 approaches that can be use when selecting grout: contrast with the tile, match the tile, or go neutral.
Matching the tile
If you’re in need of a less pronounced grout, chose the grout color that perfectly matches your tile choice. Selecting a grout color that’s one shade either darker or lighter helps in tying everything together. Also, this is a desirable option especially when you have a tile with one color since it helps in creating a fluid look. Besides, this can also be a great option when using expensive tiles, like granite tiles or marble tiles.
Contrasting with the tile
If you are looking to make a tile stand out, choose contrasting grout color for your tile. This helps in framing the tiles as well as drawing attention to them. You’ll also need to look at using a much thicker grout, especially for this situation to highlight the tile selection. This choice is much perfect for decorative tile patterns.
Neutral
If you are looking for a safe option, choose a neutral grout color from the beiges, tans, or grays. If you need something with mass appeal, neutral matching color is widely recommended approach.
Other Grout Considerations
The selection of a grout color is essential in achieving the desired look; besides, you still have to consider type(s) of grout used. Grout helps in bonding tiles and stone edges firmly and also prevents chipping hence it’s of great importance you understand the different types of grout in the market.
Also, you should consider traffic patterns in your room where the tile & grout will be applied when selecting the color. A light grout is not ideal for the busy kitchens but can be useful for less used guest baths. Notably, a darker grout fades quicker, whereas a lighter color shows stains and dirt.
Why You Should Install Bathroom Shower Tile Yourself? Look at This Benefits!
Installing bathroom shower tiles can sometimes be intimidating even for the professional DIY homeowners. But Common questions may include “Where should I start?” “How do I cut a tile?” Fortunately, with proper preparation, a do it yourself (DIY) shower tile install may seem completed for a few days. But once you complete your shower tile install, you’ll have saved yourself thousands of dollars and at the same time gained a new skill.
Presenting below are some benefits as to why you should install bathroom shower tiles yourself.
It is Cost-Effective
Getting a tile contractor to tear and replace your shower tiles costs thousands of dollars. The expense can rise swiftly depending on certain features you may opt to add. When you purchase your materials and save on labor costs, you will be able to use that cash for your other project(s).
It is Doable
With the volumes of online resources at hand, installing shower tile hasn’t been easier. You can search for various tile patterns, research how-to instructions as well as learn from mistakes of others. That’s how home improvement communities share their knowledge to benefit fellow DIYers, therefore be sure to do your research before you begin.
It is Educational
Once you know how to tile from scratch, you may share your knowledge with others. There are some essential steps to ensuring the tile job stands to constant moisture, hence take notes and ensure that you are following the appropriate action at each stage on shower tile install.
It is Convenient
If you have hired an outside help for a home renovation project, you know all concerning the disruption that may occur: contractors track in & out of your house for days as well as use loud tools. However, they work at their comfortable pace and make you see the dollar signs when project time ticks-by.
The bathroom is particularly a sensitive area for relinquishing control; your toilet & sink will be out of commission whereas workers complete the project. By installing the tile yourself, you can reduce this interruption.
It is Rewarding
Imagine taking your shower in the newly tiled unit. When you look around at the well- placed tiles, you will find yourself thinking, that your accomplished that project
That thought is a good motivator for any DIYer, even if you are currently looking at a demolished shower with no progress yet made. However, knowing that you worked as a contractor on such tile installation will always keep you smiling as well as equip you with confidence to take on bigger projects

You will receive:
- Top Ten Design Ideas In Different Rooms.
- Tips and Trick to Use in Your Room Decoration.
- DIY Design Projects.
 100% Anti-Spam Protection
ADD A COMMENT